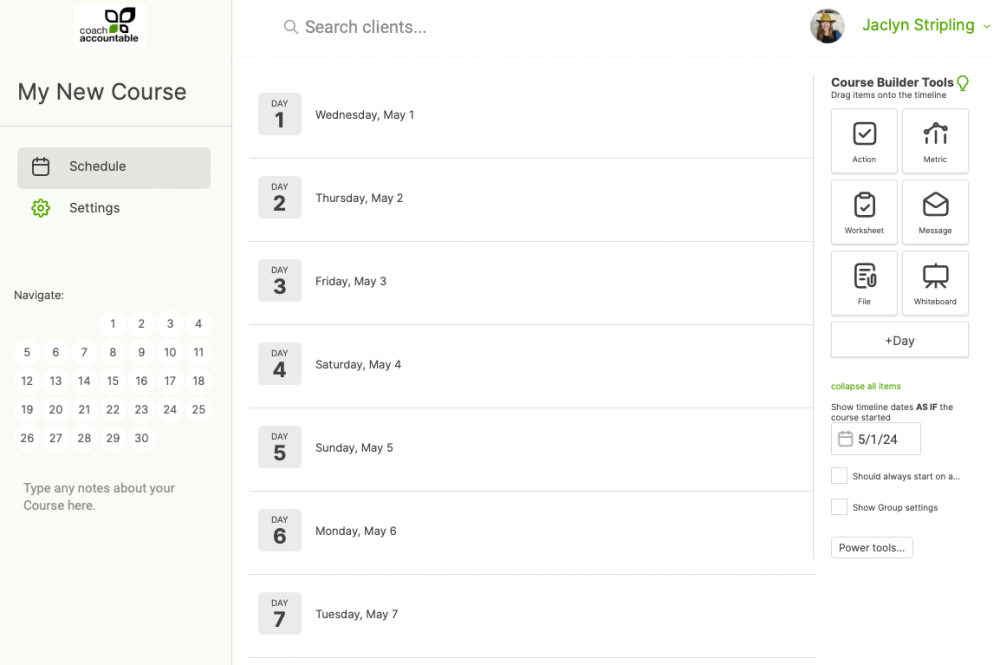
The substance and structure of your Course gets built in the Course Builder.
Here's what it looks like when you first get started:
There's a lot going on here, so let's consider some of the parts individually.
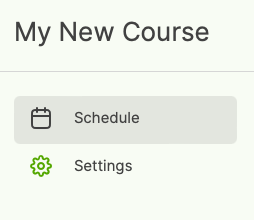
First is the left side menu:
It allows you to toggle between the Schedule area (where you design the course content) and the Basics area (where you can view and update the
basic course settings).
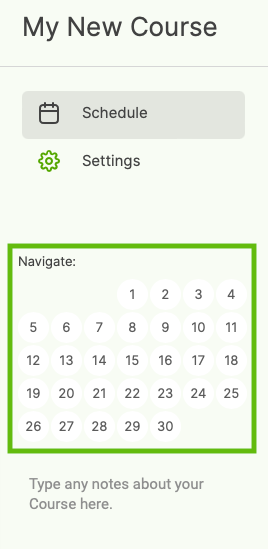
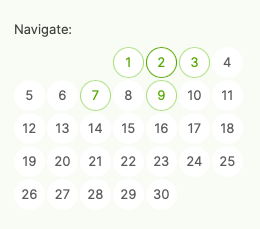
Immediately below that you'll find the Navigate menu:
This allows you to quickly jump to a particular day (or step) of the Course, simply by clicking on the number. As you build your course, the numbers will be augmented by circles to indicate the presence of one or more items on that day (or step), like so:
Darker circles for a given number mean there are more items on that day (or step), thus making the navigate menu a nice at-a-glance overview of how the content of your course is laid out.
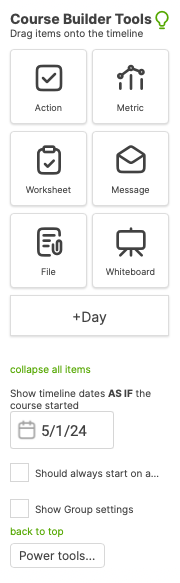
Next, on the right side you'll see the Course Builder Tools:
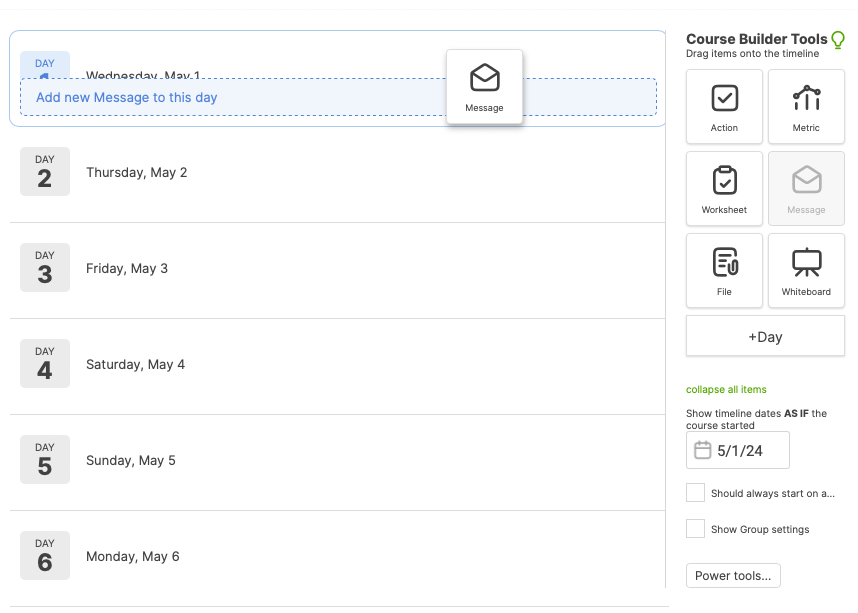
The most important part here are the big item buttons. You build the content and structure of your Course by dragging and dropping these items onto the timeline:
Double click on any one of these item buttons for details of how they work in a Course.
You can extend the overall length of the Course by dragging the +Day (or +Step button) onto the timeline, like so:
Days that are inserted between existing days will correspondingly push all subsequent items down (e.g. inserting a new day before Day 2 means any Day 2 items will now be on Day 3).
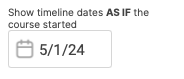
Let's now turn our attention to this curious control:
This appears when building a Day-based course. In practice, you'll be able to start your clients on a course on whatever day you like, and your client's Day 1 will be that start date.
But while building, to help you visualize when things will actually get assigned (and see how the days of the course will overlay onto weekdays and weekends), the timeline displays dates as if
the Course started on some specific day.
You can see these real calendar date overlays on the center portion of the timeline:
This "AS IF the course started" date defaults to whenever day you
created the Course, but you can change it whenever using this date picker.
Tip: Changing this "AS IF" date will have no effect on participants in the course, either those currently in progress or future.
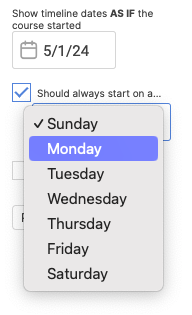
If you'd like this Course to always start on a particular day of the
week, such as for the purpose of avoiding weekends, use the checkbox for
"Should always start on a..." and choose the day of choice from the menu:
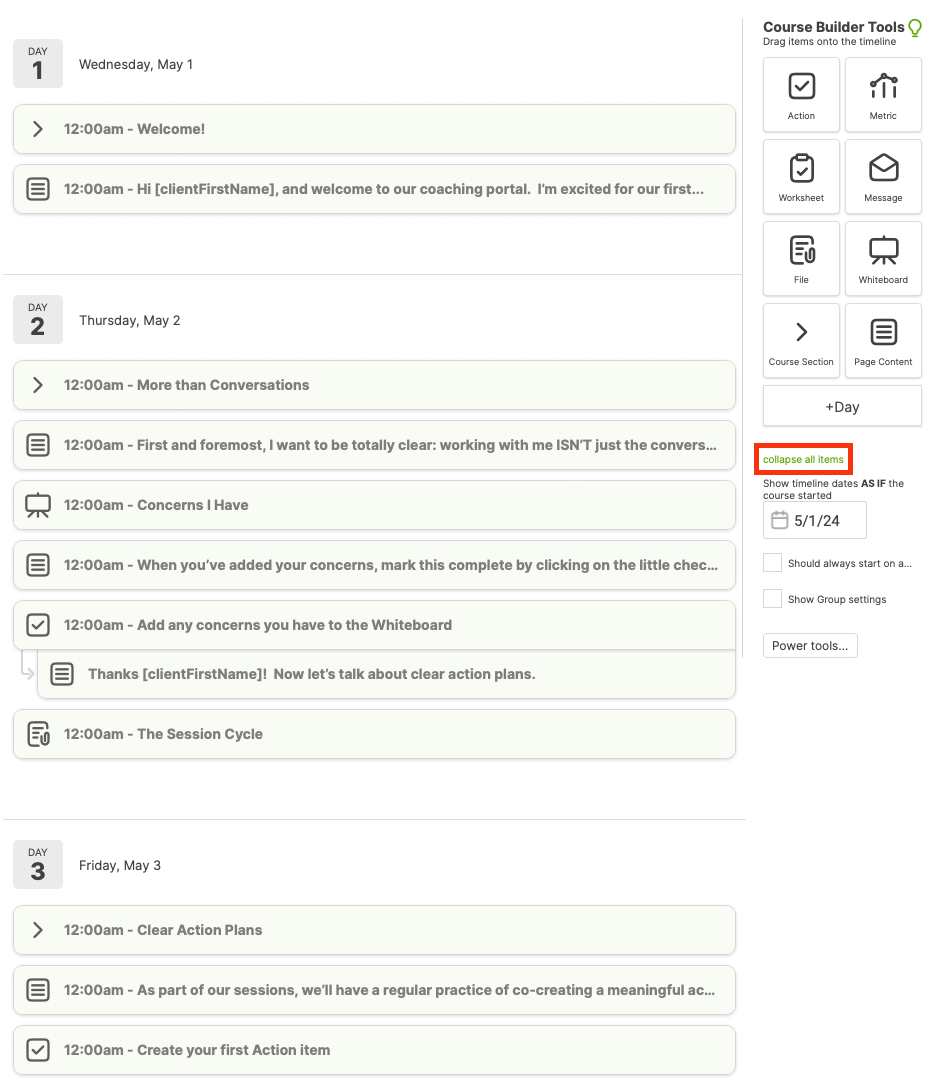
The "collapse all items" link will quickly toggle all items in the timeline to a minified view, making it easy to see the big picture of the flow of items you have in your timeline:
Also only relevant to Day-based courses, the final item in this collection is the following checkbox:
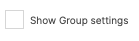
If you're planning on ever having a Group be a participant in this Course for a Group, you can check this box. Doing so means certain group-specific settings will be visible when configuring your course items.
If you only intend to have individual clients doing your Course, leaving this unchecked is a great idea, for it allows you to skip certain settings that won't be relevant. (And, like virtually everything else about a Course, you can always change your mind later!)
Adding Items to the Course
Once you're familiar with the basics of the course builder, you're ready to start adding actual content to your course. You can put any of the following into the Course timeline: Actions, Metrics, Worksheets, Files, Messages, and Whiteboards
Let's add a Course Action. Click and drag the Action button over to Day One. From here, the process mirrors that of setting up an Action for an individual client:
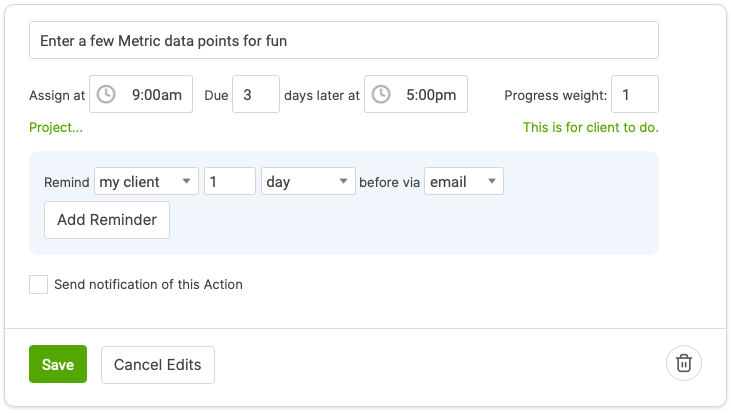
You'll indicate what the Action is, and instead of choosing an absolute date and time for it to be due, you'll select a relative number of days your client should have to do it.
If applicable, the Action can be part of an Action Project. If so, just click the "Project..." link, and you can set the name of the Project this Action should be part of.
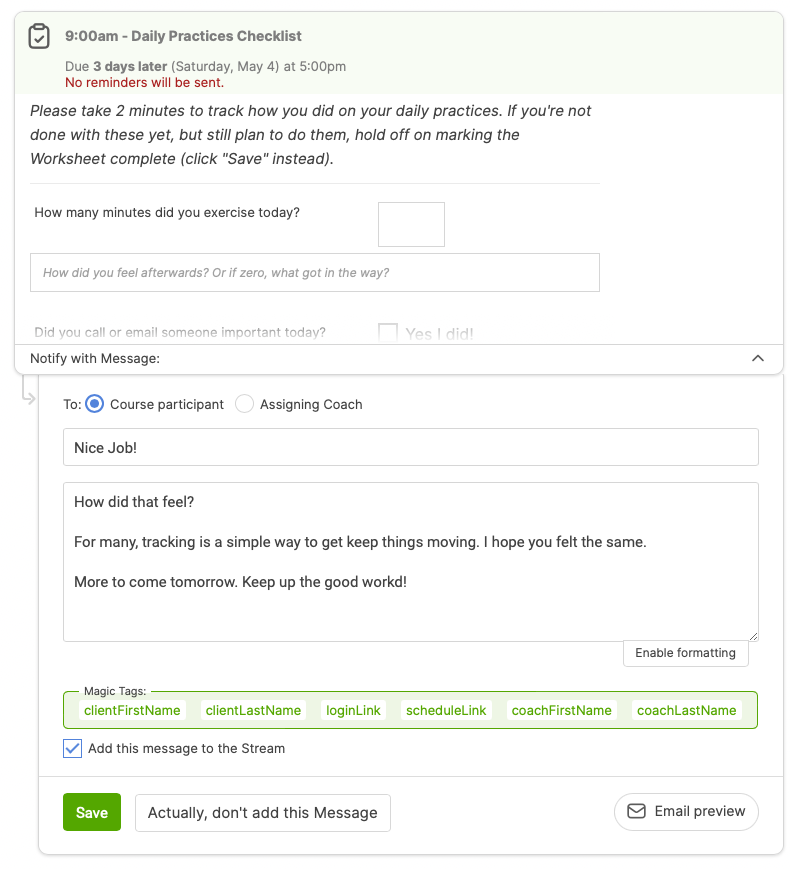
Just like for all Course items, you can opt to have the system send an email notification about it, in this case, to let your client know the Action has been assigned. Check the "Send notification of this Action" checkbox to reveal the following:
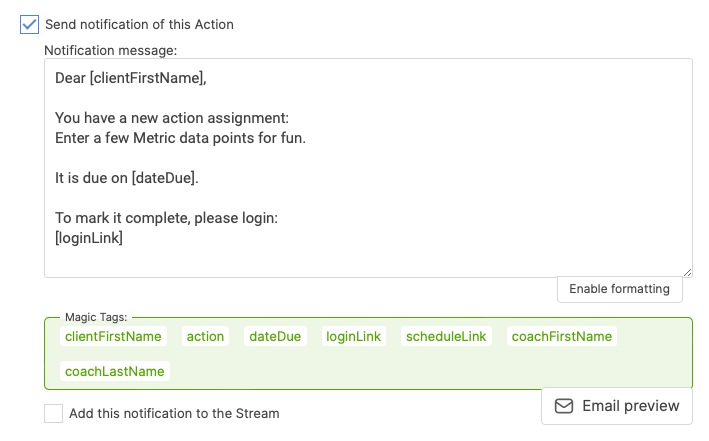
The default verbiage is generally fine, but you can customize it however you like. The magic links below are clickable for easy insertion into your message.
By clicking the "Enable formatting" button at the bottom, you can access the complete WYSIWYG tools to create a message that is more than plaintext.
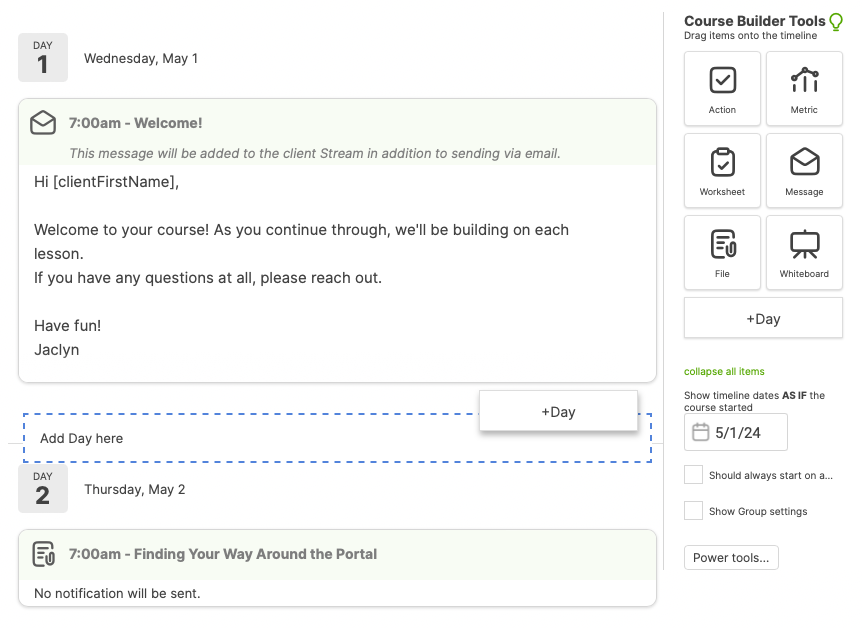
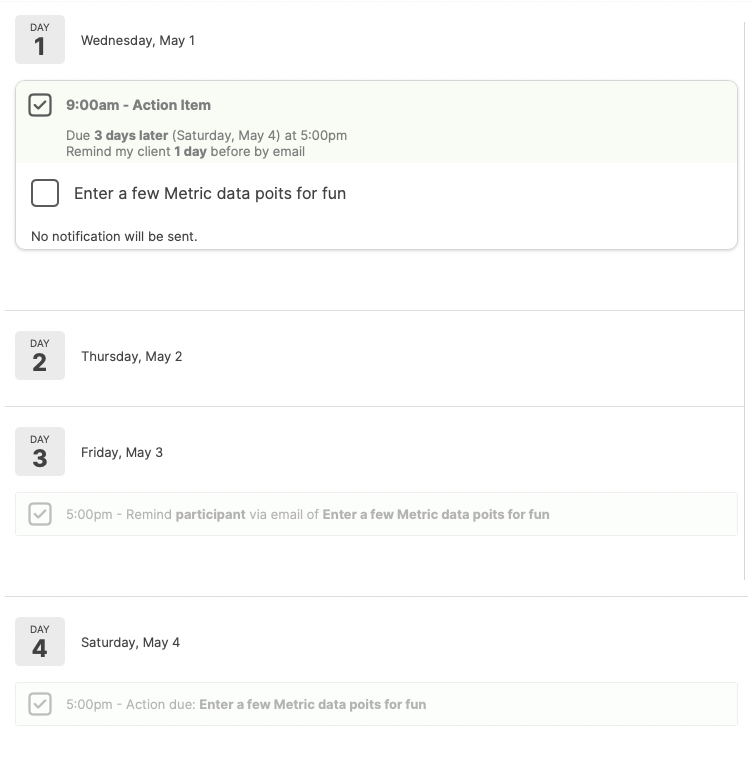
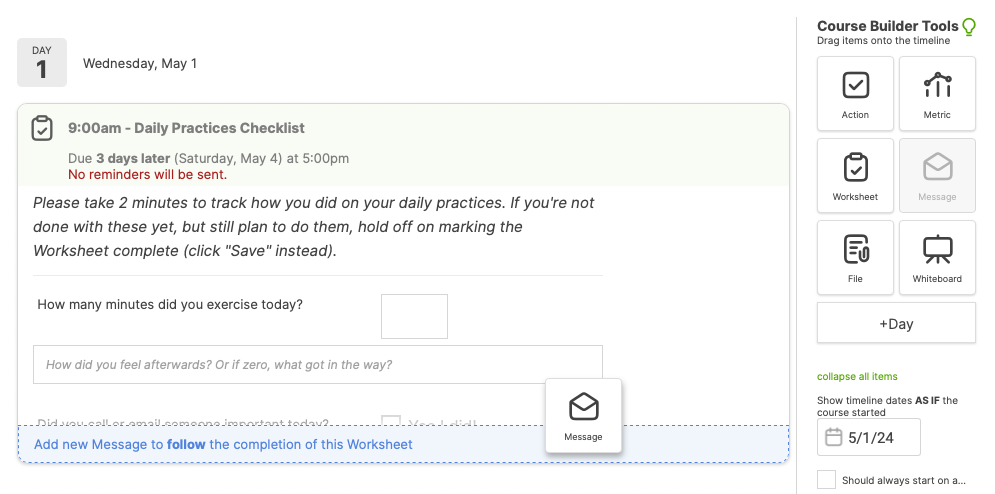
When you've got everything set as you like, click Save, and the Course Action is added to Day 1 on the timeline. This Course Action will be assigned at 9:00 a.m. on Day 1 of the Course. If we add a Course participant at any time after 9:00 a.m., the Course Action will be delivered immediately.
Here's how it looks on the timeline:
Note how, in addition to the item itself on Day 1, the reminders and the
due date we've set also appear (in this case, on Days 3 and 4, respectively). This allows a visual sense of the course's flow, including how often clients are apt to get emails. Looking this over is a good way to ensure we're not setting up a course that will be overwhelming—you might pare down or spread out reminders accordingly.
Managing Course Items
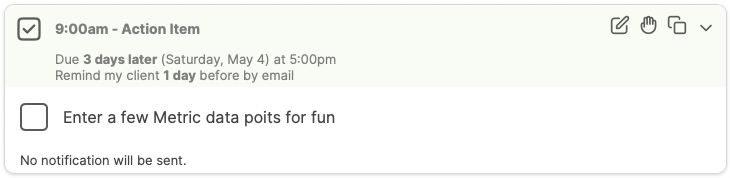
Once created, you've got several ways to manage and modify your course items further. Hover over any item to see a menu of icons in the upper right:
To edit an item, click the edit icon ( ). This brings up the same edit form as when initially creating an item, allowing you to change details, set or clear reminders, notifications, etc.
The hand icon allows you to drag the item to change the order within a day or move to another day. Note that moving an item within a day does not affect the order in which the item is assigned. Items are dispensed in a Course according to their assignment time.
Like the "collapse all" link in the Course Builder Tools area, you can collapse a single item by clicking the downward-facing arrow.
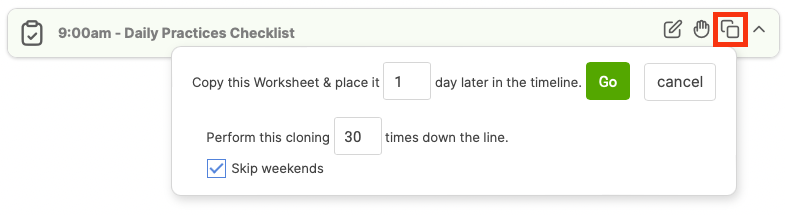
Cloning an item
To clone an item, click the clone button ( ) in the upper right of that item. Then, choose how many days later the cloned item should be placed.
To make an item repeat at a set frequency, click the "do this multiple times..." link and set the number of times you'd like to perform the clone. You can also skip weekends by ticking that box.
For example, say we've got a daily tracking Worksheet that we'd like our clients to fill out daily for a month, but only on weekdays. Here's how we can get exactly that with just a few clicks:
Tip: You do not clone a Metric to match its duration. If a Metric is set to be 30 days long, it can just be set in motion on a particular day of the course and then continue to run on its own. A Metric can even outlast a Course (e.g., you can start a 90-day Metric on Day 1 of a one-day course, which will continue for all 90 days).
Following Items
Sometimes, it is useful to share a file, send a note, or assign something else only after some other assignment has been completed. Actions, Files, and Worksheets are "followable" items, meaning you can make other item assignments dependent on their completion. The items that are attached to these Actions, Files, and Worksheets are known as "following" items because they are only dispatched following the completion of the item they follow
Create a following item by dragging an item from the Course Builder Tools directly onto an Action, File, or Worksheet in your Course timeline:
Once dropped, the usual interface for setting up the item appears:
Note the inset arrow on the left. That's your visual clue that the item below will be dispatched ONLY when the item above is completed.
Tip: You can create a chain of following items, where the completion of item 1 triggers the assignment of item 2, the completion of item 2 triggers item 3, and so on. Any Action, Worksheet, or File can have one (or more!) following items in this way.
Such chaining can go as deep as you like, with multiple items in sequence, each following the previous step.
If you find yourself using following items frequently in a Course, you may consider building a Step-based Course instead. A Step-based Course can be thought of as a sequence of Steps that are following items of the preceding Steps. Participants only advance to the next Step when they've finished the items in the preceding Step.
The beauty of Courses is that it allows you to dispense a set of items to multiple clients in only a number of clicks. Once you build and assign a Course, the system does the rest.
Building on the Fly
You don't have to have your Course completely built out before putting participants in it. You can edit Course timelines at any time, and any changes you make will be experienced by the participants when they get to that point, provided that changed point is in their future.
For example, if your client is on Day 8, any changes you make to Day 9 will be experienced by your client tomorrow. But if you make changes to Day 7, they will have no effect on that Day 8 client.
Taken to the limit, you can build a course as you go, keeping one step ahead of your participants and designing the Course flow as a reaction to how things unfold.
Tip: It's a good idea to put your freebie client in a course, and use the fast forward and rewind controls to experience the flow of things. This allows you to test things quickly, allowing you to get things just right for your clients.